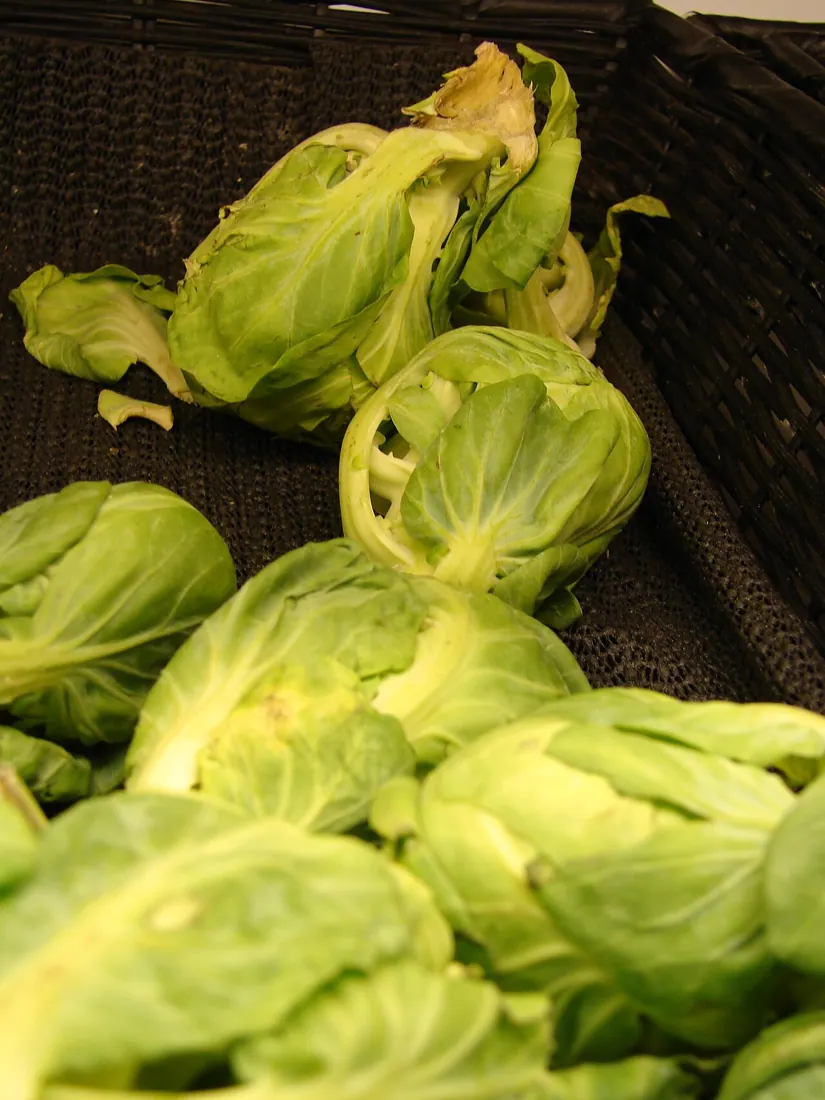
.jpg)
Brussels sprouts are a long-season vegetable: sow them in spring, give them plenty of room through summer, then pick the firm little buds that form along their stems from autumn into winter. The crucial jobs are straightforward: start early, plant into firm ground, protect the leaves from pests and harvest from the bottom upwards. If you want sprouts for Christmas dinner, plan for them months before December.
This guide is for ordinary UK gardens, allotments and larger containers. It covers sowing, transplanting, supporting the plants and dealing with the problems that can spoil a crop.
Decide how much space you have
A Brussels sprout plant is nothing like a tray of salad leaves. Most varieties grow into tall, broad-leaved brassicas with a thick upright stem. The sprouts develop at the junctions where individual leaves meet that stem. They need light and airflow around the entire plant, not just space for their roots.
Allow 60cm between plants and at least 60cm between rows, following the Royal Horticultural Society's guidance. It can feel like a great deal of empty ground when you set out tiny seedlings in May or June, but the leaves expand considerably during summer. Crowding plants generally makes harvesting and inspection harder.
If your growing area is limited, grow fewer plants rather than crowding them. For a compact variety in a container, the RHS recommends one plant in a pot at least 30cm across.
When to sow Brussels sprouts in Britain
The growing season is long, so sowing in autumn and expecting sprouts for Christmas won't work. The plant needs spring and summer to build the leafy stem that later carries the crop.
For an earlier start, sow indoors from February to April in a greenhouse, cold frame or bright indoor position. You can also sow outside from March to May, protecting the seedbed when conditions are cold. Those windows come from the RHS and cover a range of early, mid-season and late varieties; the date on your seed packet still matters.
If you are growing in Lancashire, Scotland or another cooler area, don't treat an early sowing date as permission to plant fragile indoor-raised seedlings straight into cold, exposed ground. Seed starting and planting out are separate jobs. Grow the young plants on until conditions and their size make transplanting sensible.
Choose the variety for your intended harvest: early types start in autumn, while mid- and late-season varieties are better suited to Christmas and winter cropping.
How to sow seeds in trays
A modular seed tray makes the job easier because each seedling can be removed with less damage to its roots. You need peat-free seed compost, a tray with drainage and a bright place for the seedlings.
- Fill the modules with compost and water it so it is moist before sowing.
- Place two seeds in each module, approximately 2cm deep. Cover them gently with compost.
- Keep the compost moist while the seeds germinate, without leaving it waterlogged.
- Once both seedlings have emerged, keep the stronger one in each module. Remove the weaker seedling rather than trying to grow two substantial plants in the same cell.
- Give the remaining seedlings plenty of light and check them regularly. Move them on before they become cramped or severely root-bound.
The RHS says seedlings usually emerge within a couple of weeks, but germination depends on conditions. Don't throw a tray away simply because a particular day has passed. Equally, check the compost and seed age if nothing appears after a reasonable period.
When the plants are about 10–15cm tall with a healthy root system, they can be considered for their final positions. Harden off seedlings raised indoors: place them outside for gradually longer periods in suitable weather so they become accustomed to outdoor conditions before planting permanently.
Sowing straight into the ground
Direct sowing avoids handling seedling roots, although young brassicas can be vulnerable to slugs, birds and unstable spring weather. Use a weed-free seedbed with a fine surface and soil that drains reasonably well.
You can sow in a separate nursery row and move the strongest plants in early summer, or sow where they are to grow. For final-position sowing, leave the full adult spacing between groups of seeds, then thin each group to its healthiest plant.
Prepare the bed before planting out
Sprouts benefit from fertile soil, but they also need firm anchorage. A tall plant rooted in freshly loosened, fluffy soil can rock in the wind, disrupting new roots just when it needs stability.
Remove weeds and add well-rotted garden compost or manure before planting. If you have prepared the ground well ahead of time, let it settle. On traditionally cultivated beds, firm the planting area before setting out seedlings. In a no-dig bed, you can transplant into the prepared surface mulch while ensuring the plants are securely seated.
Check soil acidity if brassicas have struggled in the same area before. The RHS advises raising very acidic soil to at least pH 6.5 to discourage club root. Test first rather than scattering lime without knowing the existing pH. Avoid repeatedly planting brassicas in the same bed year after year if you can rotate them.
Water young plants before lifting them from trays or a seedbed. Set each one into its planting hole a little deeper than before, with the lowest leaves near soil level. Firm the earth around it and water thoroughly. Good contact between roots and soil matters more than giving the stem a decorative ring of loose compost.
Looking after the crop through summer
Young Brussels sprouts need more attentive watering than plants with established roots. Check the soil beneath the surface, not just whether the top looks dry. Water when necessary to help the plants establish; as their roots develop, they normally need less frequent watering except during dry weather.
A mulch of well-rotted organic material helps conserve moisture and suppress weeds. Keep it away from smothering the stem and leave room to inspect the base for pests. Don't use feeding as a substitute for good soil, sunlight and water. Where soil is poor or growth disappoints, the RHS suggests a nitrogen-rich feed in June or July, but it isn't an automatic requirement for every garden.
Tall plants may need support before windy weather arrives. Earth up a little soil around the base where appropriate, or tie the stem loosely to a sturdy cane. Check ties as the stem thickens. A tight string that seems harmless in June may bite into the plant later.
Remove leaves that have completely yellowed and are hanging at the bottom when they obstruct airflow or become decayed. Avoid stripping healthy leaves indiscriminately: they are how the plant gathers energy for growth.
Protect Brussels sprouts from birds and insects
If you have previously grown cabbage or broccoli, you'll recognise many of the same threats. Pigeons can shred young foliage, and cabbage white caterpillars can eat large sections of leaf before you notice. Club root is a different problem, affecting the roots rather than the leaf surface.
The most useful preventive measure is fine-mesh protection supported clear of the plants, fixed so insects and birds cannot easily get underneath. Leave enough room for the plants to expand; netting pressed against leaves is less effective. Check the mesh and its edges after windy weather, and inspect the foliage underneath rather than assuming a cover guarantees protection.
Look beneath leaves for caterpillars and remove them where appropriate. Slugs are particularly troublesome around seedlings and transplanting time, so monitor the base of each young plant. If a plant wilts or fails to develop despite adequate moisture, examine the roots and growing conditions rather than assuming it just needs fertiliser.
For club root, prevention is important. Avoid moving contaminated soil between plots and pay attention to crop rotation. Where the disease is established, the RHS recommends starting sprouts in modules so their roots are well developed before transplanting. This doesn't make infected ground safe, but it can help a plant establish.
When and how to harvest Brussels sprouts
The sprouts begin as tiny buds along the central stem. Don't pick them simply because they're visible: wait until the lower ones are firm, tightly closed and roughly walnut-sized. Loose, yellowing buds are past their best for ordinary kitchen use.
Begin at the bottom of the stem. Gently snap off the mature buds, leaving smaller sprouts higher up to develop. Take a few from each plant as they become ready. You can remove the lowermost leaves as you harvest to make access easier.
Modern varieties sometimes mature quite uniformly. If you want to clear a bed or gather a large harvest, cutting the full stalk may be practical, but you don't have to do that just because several buds are ready. Through cold weather, leaving plants standing lets you pick for individual meals. The RHS notes that frosty conditions can improve their sweetness.
Once the sprouts are finished, inspect the leafy top. Tender sprout tops can be cooked as greens, giving you another use from a plant that has occupied your plot for many months.
Why sprouts sometimes produce loose or small buds
Loose, leafy buds: Check the variety, growing conditions and whether the plant had enough light and time to mature. Don't expect every sprout to be a perfect supermarket sphere. Prolonged stress, overcrowding or very late development can affect the crop.
Very few sprouts: Review the sowing date first. A plant started too late may grow foliage without enough season left to form a useful winter harvest. Poor establishment, shading and serious pest damage can also reduce the crop.
Plants leaning over: Wind rock is common with tall brassicas. Support the stem and firm the soil at the base as needed. Don't wait until a gale has almost pulled the plant out of the ground.
Holes in the leaves: Inspect for caterpillars, slugs or pigeon damage. A little cosmetic leaf damage needn't mean the harvest is lost, but extensive damage while the plant is young can set growth back.
Yellow lower leaves: Some older leaves naturally deteriorate as the season progresses. Remove badly decayed material and inspect the rest of the plant; widespread yellowing or collapse calls for a closer look at soil, roots and disease.
Questions before you start
Can Brussels sprouts grow in pots?
Yes, provided you choose a suitable compact variety and give it one sufficiently large, stable container. The RHS specifies at least 30cm diameter for a single plant. Remember that the compost dries faster than garden soil and that a top-heavy plant may need support.
Can I grow them in shade?
They prefer a sunny position. Some varieties tolerate partial shade, but a dark corner beneath trees is unlikely to be your best cropping area. Choose the brightest reasonably sheltered location available.
Do I need lots of plants for Christmas?
Not necessarily. A few healthy plants can provide multiple pickings, although yields vary. Grow enough to suit your space and household, and choose a variety with a winter cropping period rather than judging solely by the size of the seed packet.
Do frosts kill Brussels sprout plants?
Established plants are generally hardy and well suited to a British winter. Young seedlings and exposed plants still benefit from appropriate protection. Hardiness doesn't eliminate the need to check supports, wet ground and pests.
Sources and further reading
- Royal Horticultural Society — How to grow Brussels sprouts. UK sowing windows, transplanting, spacing, soil, crop care and harvesting.
- Royal Horticultural Society — Watering vegetables and fruit. How vegetable watering needs change as crops establish.